

Never Have Boring Coasters Again.

If you're like me, coasters are probably not something you think about until someone catches you not using one on their prized coffee table. However, recently I have been noticing that there are some really cool coasters out there! Not only can they be cool, but coasters are such a fun and simple way to add a little personality to a room. That's why I declare that no one should ever have to suffer having boring coasters ever again! While there's lots of coasters on the market, here at Nufun, we are all about the handmade good stuff. In this post I'm going to teach you how to make your own adorable coasters out of wood and burlap! Here's what you'll need:

- Coaster Blanks - either wood or burlap. You can find them in just about any craft store.
- 1 sheet NuFun Activities Light Transfer Paper (Makes 4 4" coasters)
- Scissors
- Hand Iron
- Pillowcase or other fabric to cover ironing surface
- Choose your design and size it to fit your coasters. You can find the PDF of the cute coffee cups I used for mine here. As I do a lot, I found mine on All Free Downloads!
- Print your image on the unlined side of your transfer paper. Be sure to MIRROR your image before you print!
- Cut around your image. You will want the transfer paper to cover the entire surface of your coaster so you're better off leaving a little extra than cutting too close.

- Place your image, printed side down on your coaster.
- Using your iron on its hottest setting, iron the transfer completely for 2 minutes. Be sure to iron the entire thing.
- Peel the transfer paper off the coaster while its still hot. Just don't burn yourself!
- Enjoy your adorable little table savers!
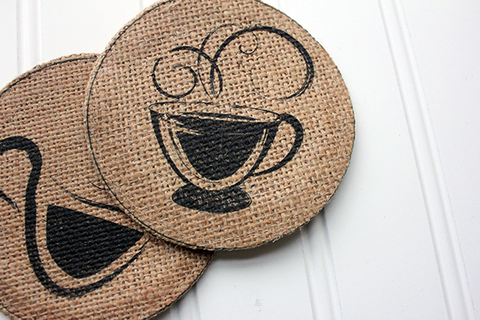
No one will believe you made these little beauties all on your own!
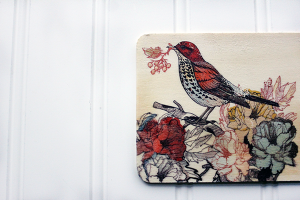
- Follow steps 1-4 exactly like the burlap instructions. Find the bird graphics I used for these here.
- Again, with your iron on its hottest setting, iron the transfer completely for two minutes. Be careful to avoid rubbing the transfer while you iron as the transfer paper can slide around on the flat wood surface. *Take note that the wood surface might start to darken or burn slightly. This gives the wood a very cool worn look.
- Peel the transfer paper while its still hot BUT, here's where it can get dicey. See the image below. In order to smoothly transfer the image to wood, the transfer has to get VERY hot and if it doesn't, the image can be splotchy. If you begin to peel your transfer paper and notice that the image is a bit splotchy, simply lay your transfer back over the area and continue ironing until you're satisfied with the result.

I personally like the splotchy look because I think it gives some country chic feel.
- Once you're done transferring, you may want to seal your wood coasters, or let them get a little wear and tear. I think it gives them some character!
Have some good transfer project ideas or want to share some of your success? Get in touch with us!
